Customising
Most changes need no code at all: your own fields, your own lists, added from the form that needs them. The ones that do need code have an obvious place to go.
Custom fields
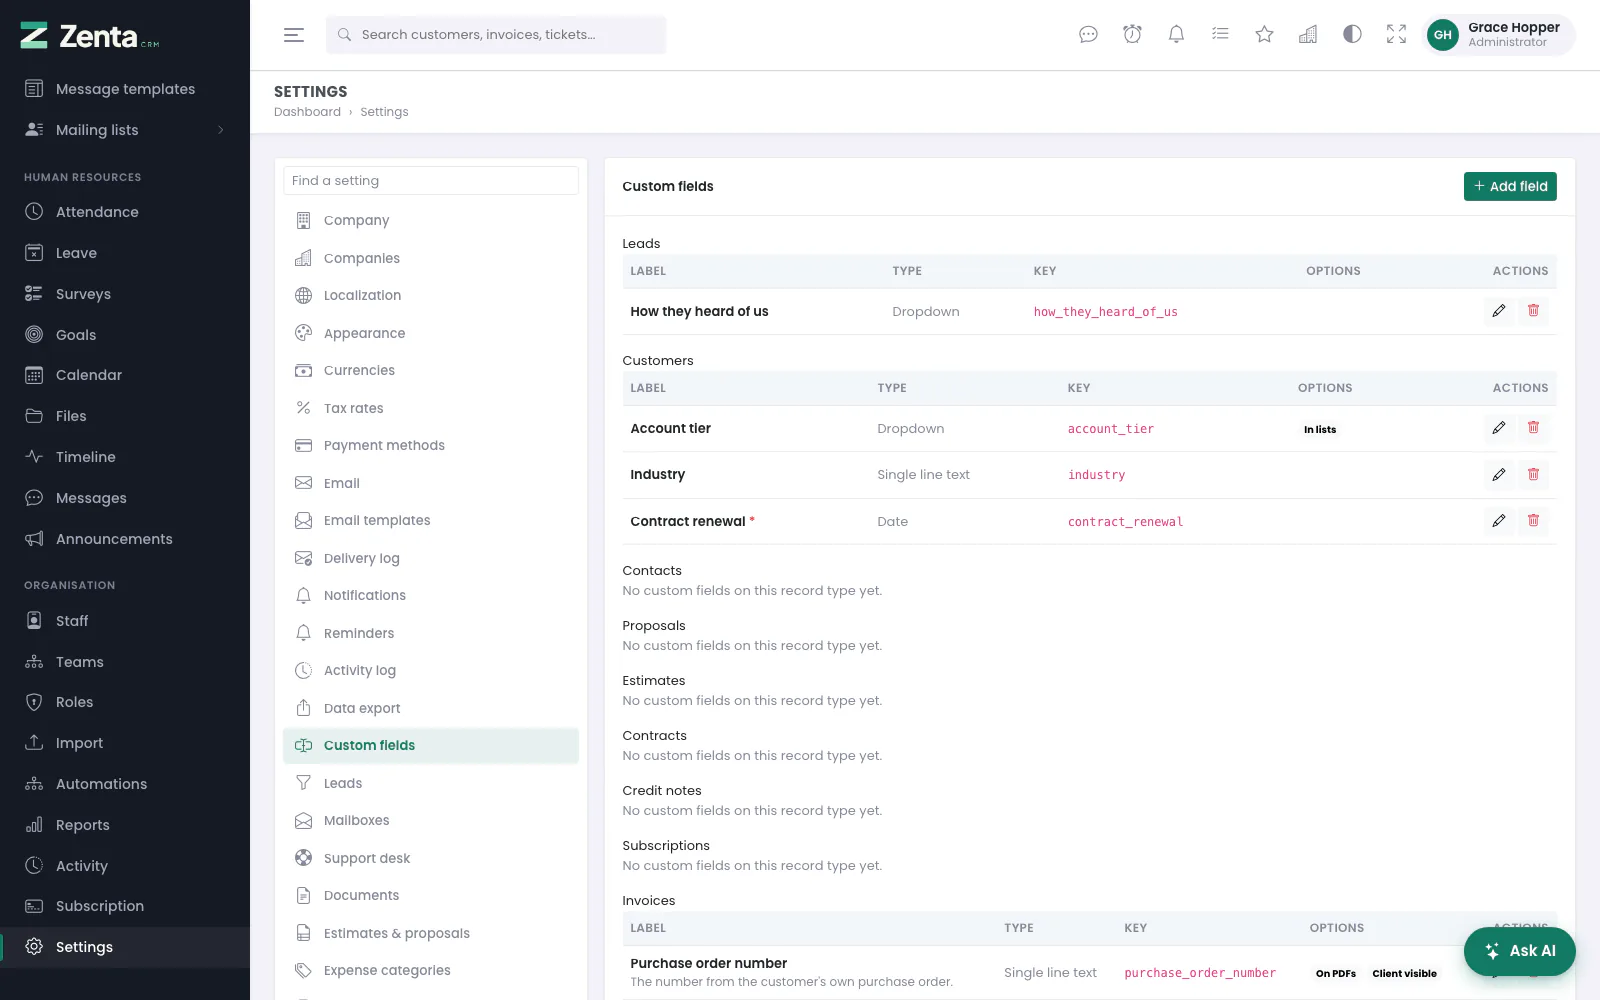 Custom fields, grouped by the kind of record they belong to.
Settings → Custom fields adds fields of your own to the records you keep — an account tier on a customer, a purchase order number on an invoice, a billing code on a project. The screen lists every kind of record that accepts them, each with its fields: the Label (a red star when it is required, and its help text under it), the Type, the Key it is stored under, and badges for In lists, On PDFs, Client visible and Inactive.
Fields can be added to twenty-one kinds of record:
| Area | Records |
|---|---|
| CRM | Leads, customers, contacts |
| Sales | Proposals, estimates, contracts, credit notes, subscriptions, invoices, payments, items, expenses |
| Delivery | Projects, tasks, timesheets |
| Support | Tickets, knowledge base articles |
| Staff and the rest | Staff, calendar events, goals, surveys |
Adding a field
 Adding a field. Choices appear only for a dropdown or a multi-select.
- Press Add field.
- Fill in the form (below) and press Add field. The list reloads with the new field under its record type.
| Field | What it does |
|---|---|
| Attach to | Required. The kind of record the field belongs to. It cannot be changed afterwards. |
| Field type | Required: Single line text, Paragraph text, Number, Date, Dropdown, Multi-select, Checkbox, Web address or Email address. Each checks what is typed into it: a web address must be one, a number must be a number. |
| Label | Required, up to 120 characters. What people see beside the box. The key is made from it (Purchase order number becomes purchase_order_number) and must be unique on that record type — the same label can be used on leads and on invoices. |
| Display order | A number; lower comes first on the form. |
| Choices | Dropdown and multi-select only: one choice per line. Blank lines and repeats are dropped. A dropdown refuses a value that is not one of its choices. |
| Default value | Optional. Filled in on a new record's form. |
| Help text | Optional, up to 255 characters. Shown under the box. |
| Required | The record's form cannot be saved without it. |
| Active | On for a new field. An inactive field disappears from forms and lists, but what was recorded in it is kept. |
| Show in list views | Adds a column for it to the record's list, and to that list's export. |
| Show on PDF documents | Prints it on the record's PDF — see Printing custom fields. |
| Visible in the client portal | For customer and contact fields: asked on the customer portal's registration form, where registration is open. |
A checkbox field reads Yes or No wherever it is shown.
Changing a field
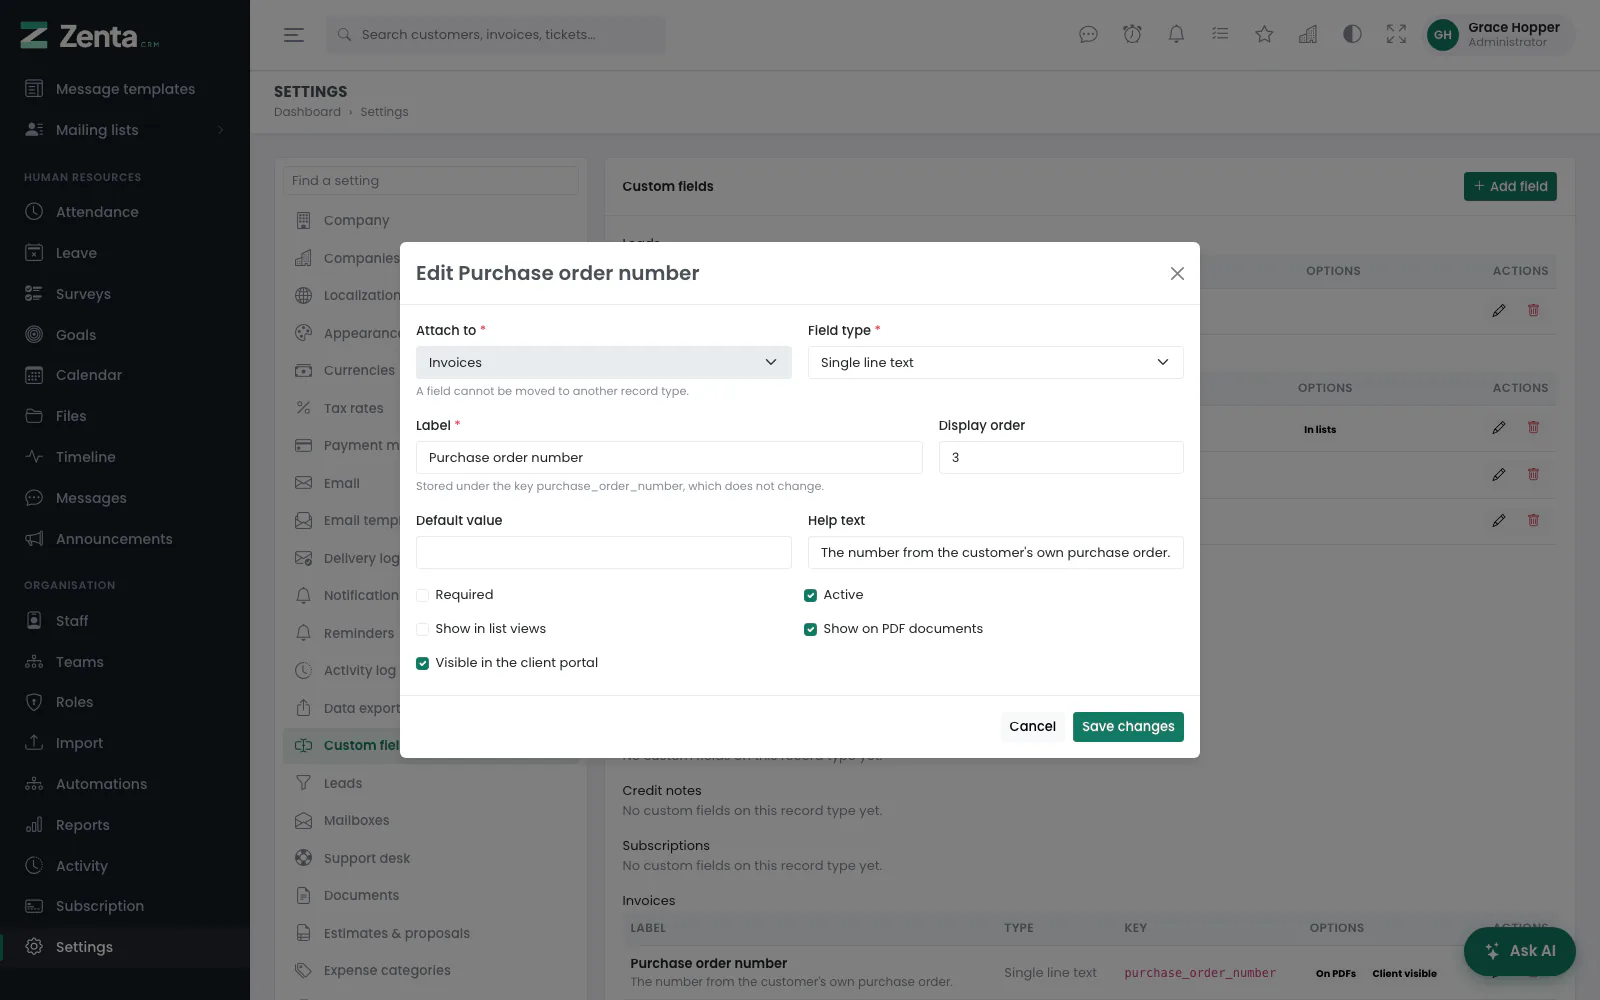 Editing a field: the record type and the key stay as they are.
The button opens the same form. Everything can be changed except Attach to and the key, which the form shows under the label (Stored under the key …, which does not change): every value already recorded is filed under them, and changing either would quietly detach those values. Renaming the label therefore changes only what people see. Press Save changes.
Deleting a field
The button, then confirm. Deleting a field also deletes every value already recorded against it, on every record, and that cannot be undone. To stop using a field but keep what it holds, untick Active instead.
Where the fields appear
An active field appears on its record's form, and on the record's page where it has one. For the newer record types:
| Record | Filled in on | Shown on |
|---|---|---|
| Items | the item form under Items | the items list (fields with "Show in list views"), the items export, and on PDFs under every document line added from the item (fields with "Show on PDF documents") |
| Timesheets | the "Log time" form | the timesheets list and its export |
| Calendar events | the event form | the event's panel on the calendar |
| Goals | the goal form | the goal's card |
| Payments | the Record payment form on an invoice | the payment on the invoice page, the payments list and its export |
| Surveys | the new-survey form and the survey's settings | the survey's results page |
Printing custom fields
Tick Show on PDF documents on a field to print it. Invoices, estimates, proposals and credit notes print their own fields beside the dates at the top; contracts print theirs with the contract details; item fields print under the lines they were added as. On the other records the switch has no effect, because they have no PDF.
The lists you file things under
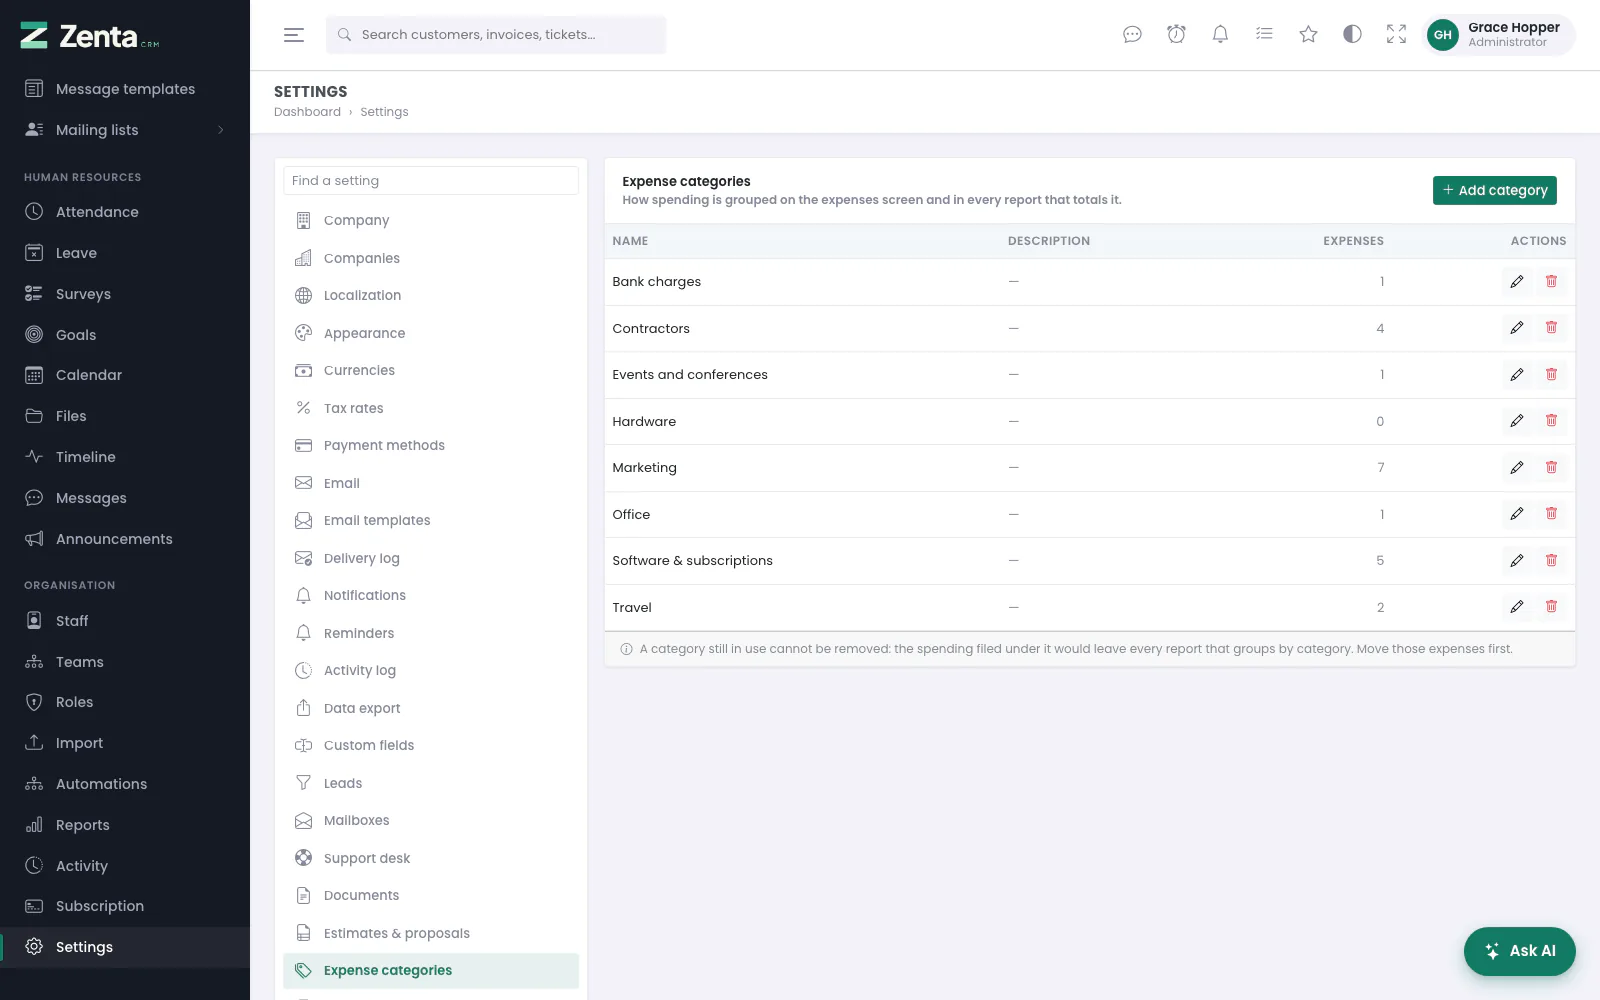 One of the seven lists. Entries can also be added from the form that needs them.
Seven lists decide how records are grouped, and every one of them is chosen from a dropdown somewhere in the application:
| List | Chosen on | Managed at |
|---|---|---|
| Project categories | Projects, project templates | Settings → Project categories |
| Expense categories | Expenses, recurring expenses | Settings → Expense categories |
| Item groups | The item library | Settings → Item groups |
| Contract types | Contracts, contract templates | Settings → Contracts & signing |
| Leave types | Leave applications | Settings → Leave types |
| Knowledge base categories | Articles, videos | Knowledge Base → New category |
| Departments | Tickets, canned replies, ticket templates, mailboxes | Settings → Support desk |
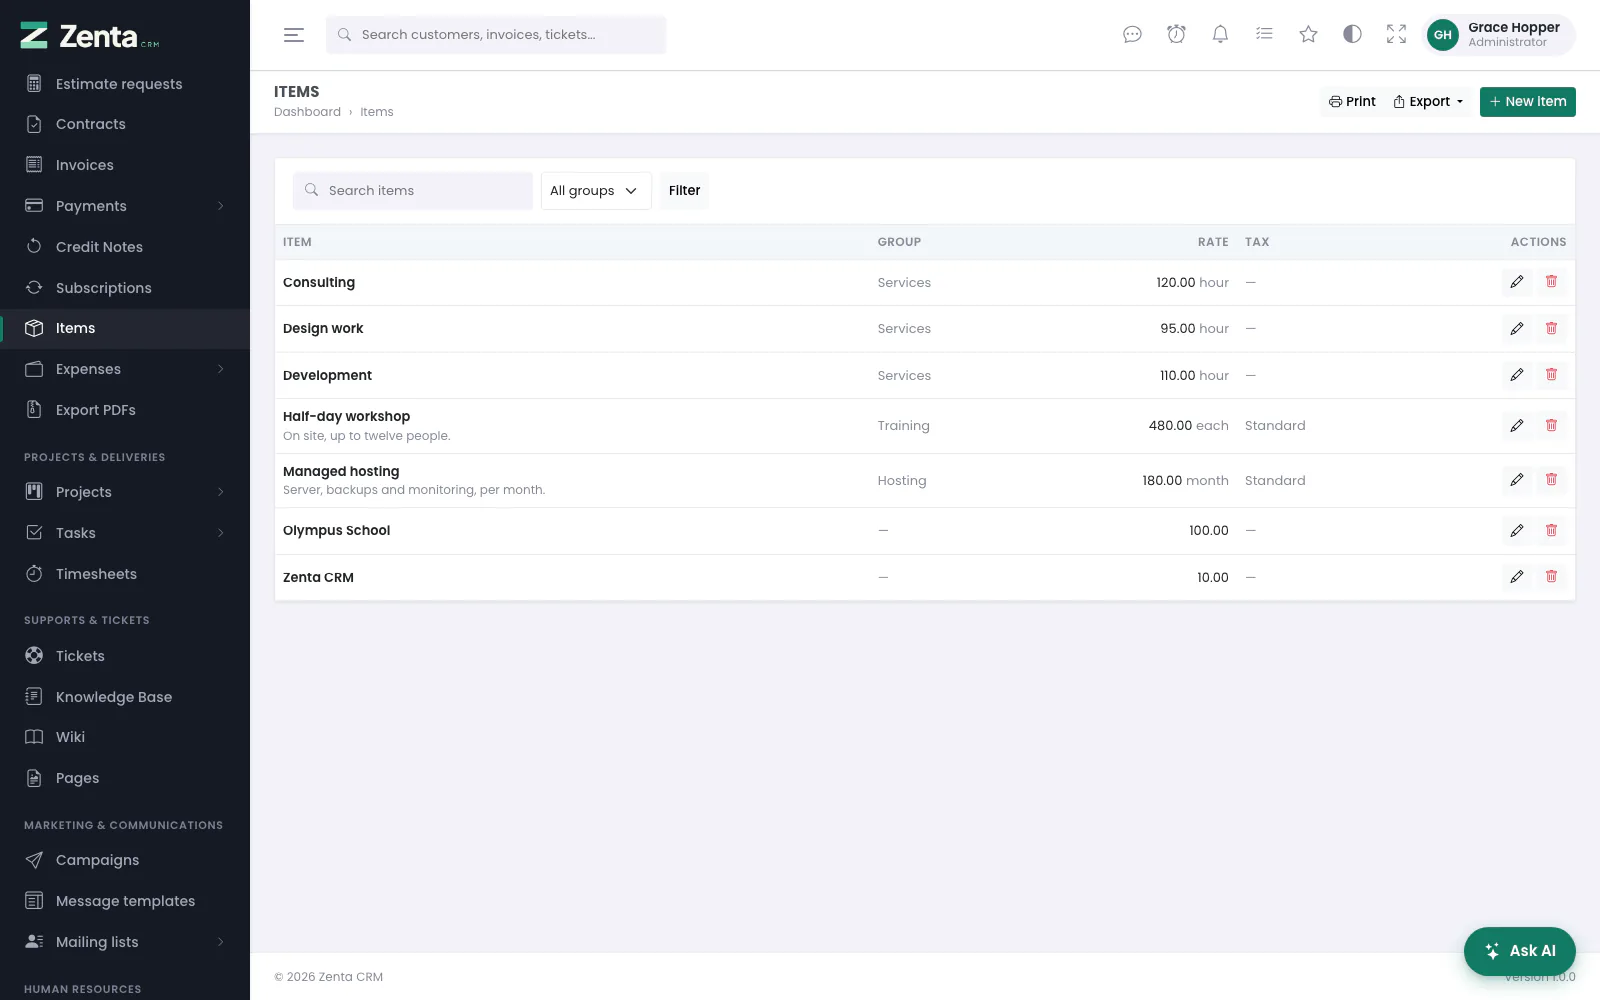 The item library: what you sell, at what rate, filed into groups.
Adding one without losing your place
 The + beside the Category dropdown, pressed on the projects screen: a name and a colour, over whatever you were doing.
Every one of those dropdowns has a + beside it (its tooltip says, for example, Add project category). It opens a short form over whatever you were already filling in:
- Name — required, up to 100 characters, and not one the list already has.
- Colour — only for the lists that carry one: project categories, contract types, leave types and knowledge base categories. It starts on the list's usual colour.
Press Add. The new entry appears in the dropdown, already chosen, with the form underneath exactly as you left it. Nothing is lost and nothing has to be started again. Cancel closes the short form and changes nothing. Manage the whole list in Settings., at the foot of the short form, is a link that opens the screen where the whole list is kept, in a new tab, so the form you were filling in stays as it was.
The short form is deliberately short, and says so at its foot: Manage the whole list in Settings. Descriptions, ordering, whether a leave type is paid (a leave type added here is paid and needs approval), which department is the default (one added here never is) — all of that stays on the list's own Settings screen.
Removing one
A list entry that still has records filed under it cannot be removed. The records would keep their work but lose their grouping, quietly dropping out of every report that totals by category — and, for project categories, out of every role limited to certain ones. Move them first, then remove it.
config/categories.php:
the model, its table, a label, and whether it carries a colour. Both the dropdown
component and the endpoint behind the + read that file, so nothing
else has to be written.
Appearance
Settings → Appearance sets the accent colour, light or dark default and every colour around them, keeps named themes, dresses the sign-in page and adds your own CSS and JavaScript; the logos and favicon are uploaded under Settings → Company. See Appearance. The whole interface is driven by CSS custom properties, so changing the accent recolours everything consistently — including the charts.
The custom properties are declared at the top of public/assets/css/app.css.
Rather than editing that file, which an update replaces, put your own rules under
Appearance → Custom code.
The config files
A lot of behaviour lives in plain PHP arrays rather than in code:
| File | Controls |
|---|---|
config/zenta.php | Application name, version and theme defaults. |
config/navigation.php | The sidebar: order, icons, labels, which permission each item needs. |
config/permissions.php | Every module, its abilities and the scopes it supports. |
config/custom-fields.php | Which records accept custom fields, and the field types. |
config/categories.php | The lists that have a + beside their dropdown. |
config/modules.php | What each switch under Settings → Modules reaches. |
config/settings.php | Every setting and its default. |
config/tenancy.php | SaaS mode and how workspaces are resolved. |
php artisan config:clear after editing a config file
if you have cached your configuration. Otherwise the old values keep being used.
Language
Every string in the interface goes through Laravel's translation helper, and the
translations are JSON files in lang/. The workspace language, the
languages on offer and right-to-left layout are set under
Settings → Localization; adding a language of your own is
described in Languages.
Adding your own module
The application is deliberately made of reusable pieces. A new module usually needs:
- A migration with a
tenant_idcolumn. - A model using
BelongsToTenant, andScopedByPermissionif it should respect scopes. - An entry in
config/permissions.php. - An entry in
config/navigation.php. - A controller and views, following any existing module as a template.
Traits worth knowing about:
| Trait | Gives you |
|---|---|
BelongsToTenant | Automatic workspace scoping on every query. |
ScopedByPermission | visibleTo($user, 'module') — filters by the person's scope. |
HasCustomFields | Custom field support, and the <x-custom-fields> component. |
HasLineItems | Document lines, totals, discounts and taxes. |
HasAttachments | File uploads against the record. |
HasTags | Free-form labels, with filtering. |
Addresses on this page
For reference and for anyone scripting against the panel. Everything here needs somebody signed in to the workspace whose role allows it; anybody else is refused.
| Method | Address | What it does |
|---|---|---|
GET | admin/settings/custom-fields | The custom fields, by record type. |
GET | admin/settings/custom-fields/create | The Add field form, in a pop-up. |
POST | admin/settings/custom-fields | Adds a field. |
GET | admin/settings/custom-fields/{custom_field}/edit | The edit form, in a pop-up. |
PUT | admin/settings/custom-fields/{custom_field} | Saves a field; its record type and key stay as they were. |
DELETE | admin/settings/custom-fields/{custom_field} | Deletes a field and every value recorded against it. |
GET | admin/categories/create | The short form behind a dropdown's +, with kind (a key from config/categories.php) and target (the dropdown to fill). Used by the page itself. |
POST | admin/categories | Adds the entry and hands back its id and name for the dropdown. Used by the page itself. |