Installation
Extract the files, create a database, open your site and answer a few short questions.
Before you start
A server with PHP 8.3 or newer and MySQL 8 or MariaDB 10.4 — the full list, with the PHP extensions, is under What you need. The installer checks every one of them for you. Then you need two things from your hosting control panel:
- An empty MySQL database
- A database user with full rights to it, and that user's password
In cPanel both are under MySQL Databases. Create the database, create the user, then add the user to the database with All Privileges.
Zenta CRM installs on a main domain (yourdomain.com) or a
subdomain (crm.yourdomain.com), each in the folder that address
opens. A sub-folder of a site, such as yourdomain.com/crm, is not supported: give
it a subdomain instead.
Installing
 The sign-in page, once the installer has finished.
-
Extract the files into the folder your address opens.
Everything inside
main-files/goes there:public_html/for a main domain, or the folder your panel made for the subdomain (in cPanel, Domains shows it as the subdomain's Document Root, for examplepublic_html/crm.yourdomain.com). The easiest way is to uploadmain-filesas one zip and press Extract in cPanel's File Manager, which keeps the hidden.htaccessfile. If you upload file by file instead, turn on Show Hidden Files first. -
Open your site in a browser.
The installer starts by itself. There is no document root to change: the included
.htaccesssends every visit to thepublic/folder and keeps your.env, the code and the logs off the web. If your host lets you point the address atpublic/directly, that works too. If you see Almost there: this server skipped the .htaccess file instead, see Troubleshooting.
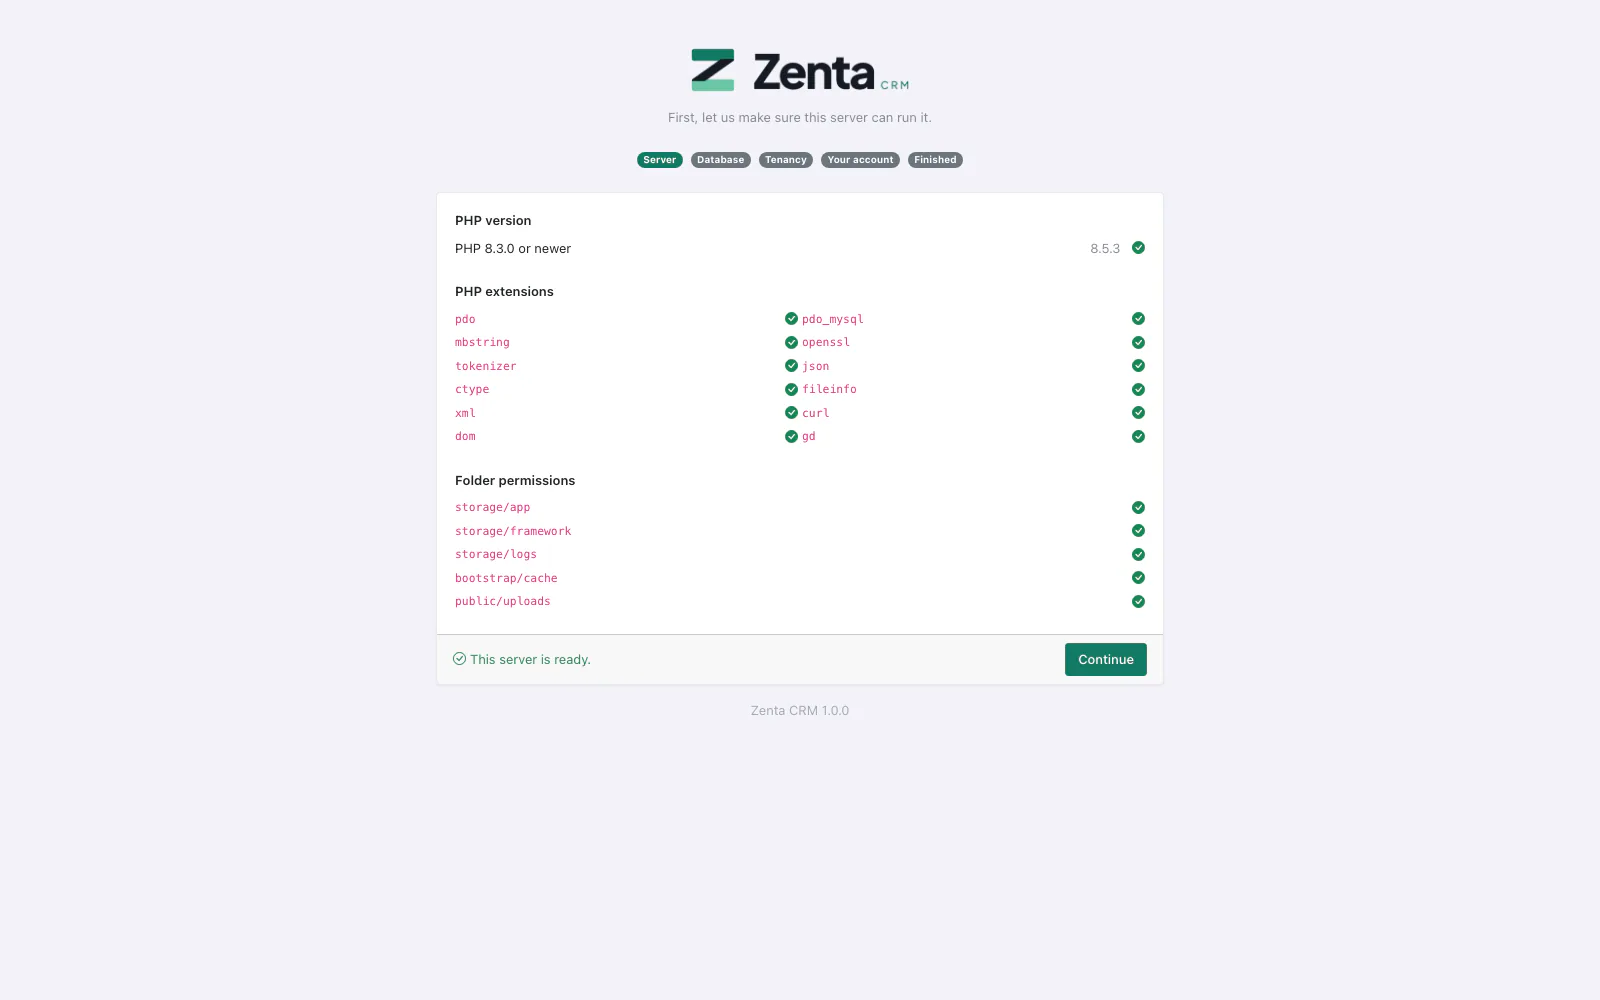 The server check. Anything red is explained on the page.
- Server check. Everything should have a green tick. Anything red is explained on the page — usually a folder that needs its permissions set to 755.
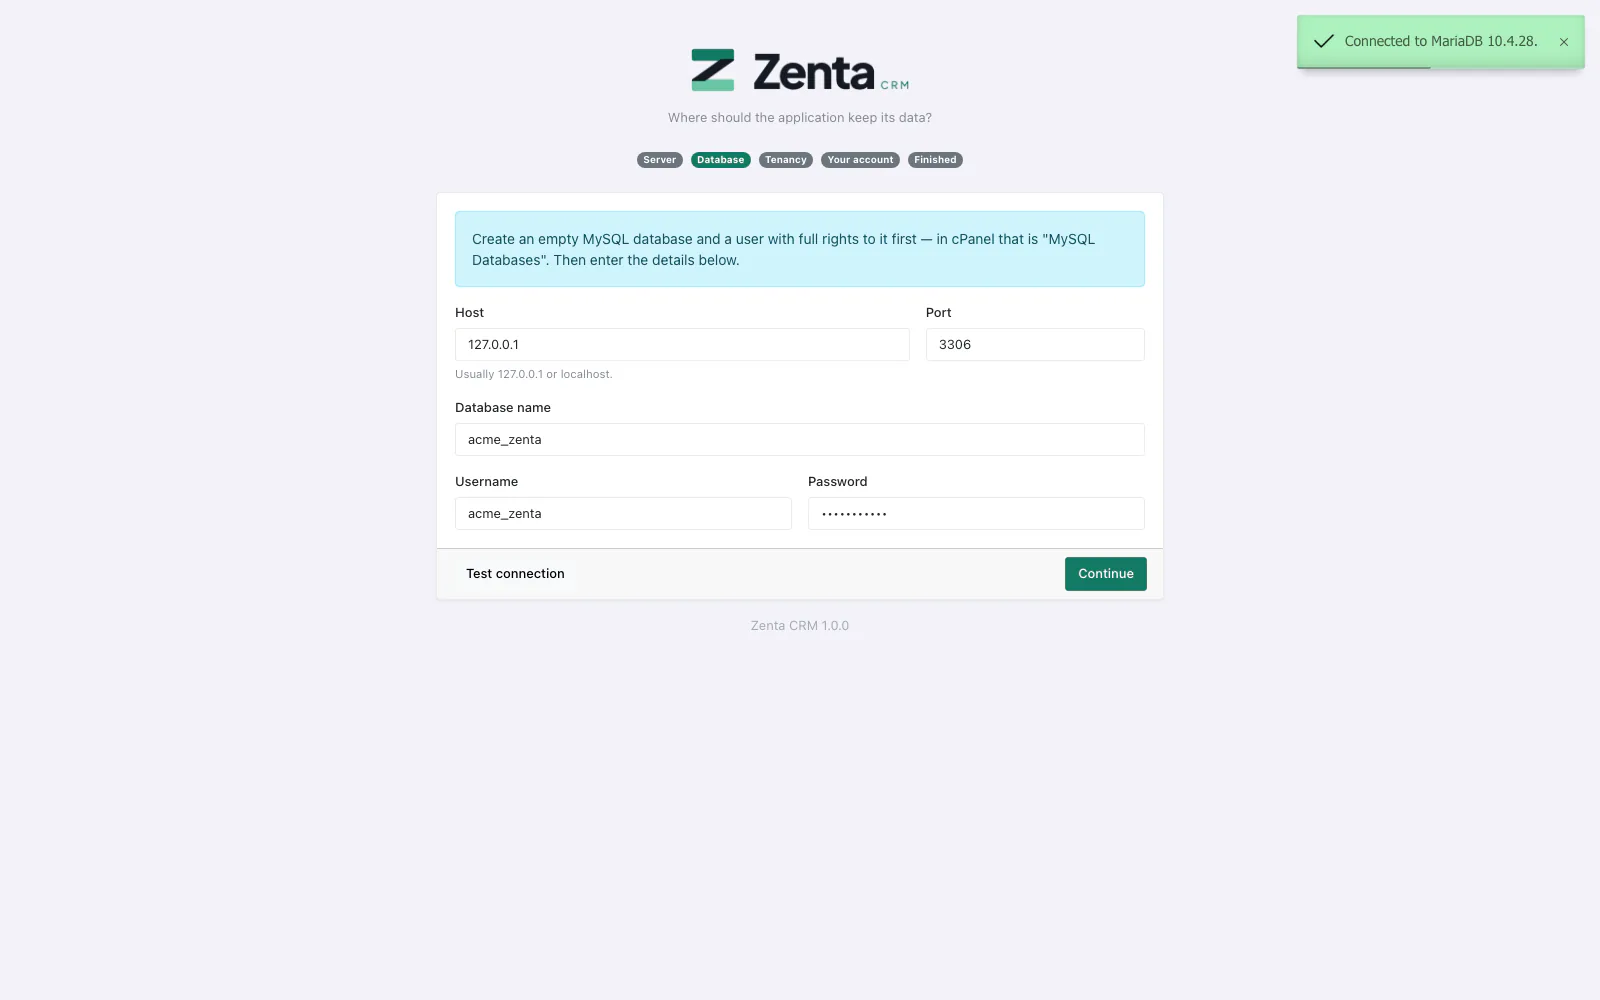 The database step, after Test connection has reached the server.
-
Database.
Enter the Host (almost always
127.0.0.1orlocalhost), Port, Database name, Username and Password from your control panel. On cPanel the database and the user both start with your account name, likeacme_zenta. Press Test connection before continuing: it names the server it reached — Connected to MariaDB 10.4.28 or Connected to MySQL 8.0.46 — or says in words what is wrong. It also refuses a database that already holds somebody else's tables, so an install can never land on top of another application's data.
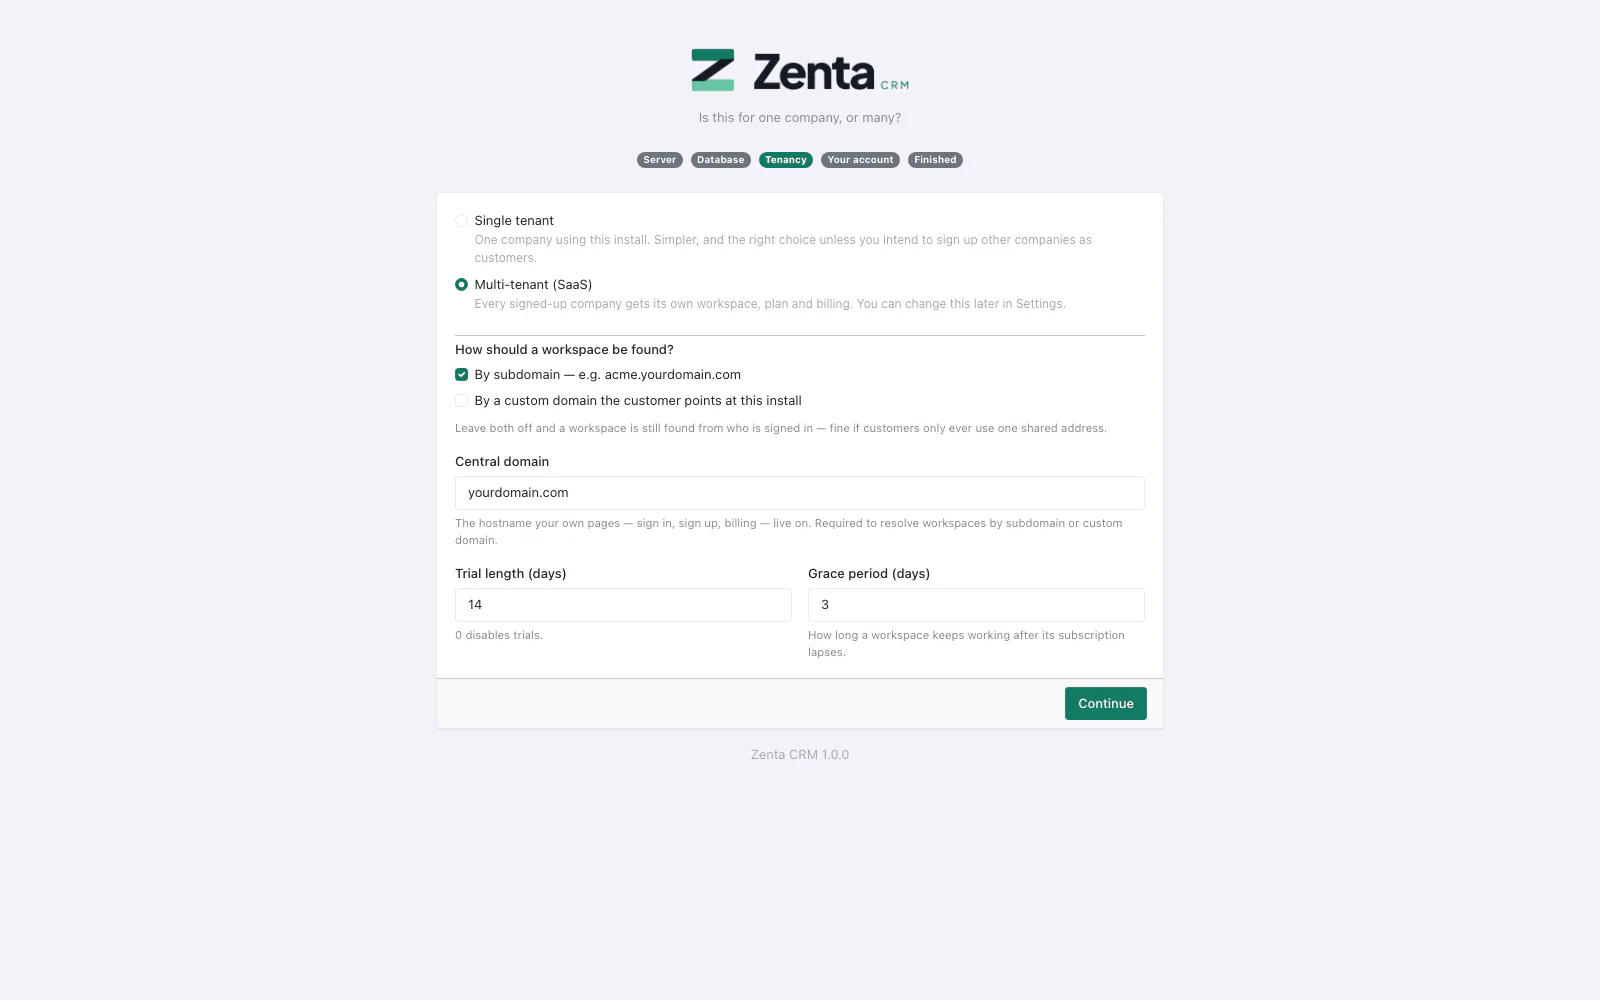 The tenancy step, with Multi-tenant (SaaS) chosen and workspaces found by subdomain.
-
Tenancy — one company, or many?
Choose Single tenant if this install is for your own business: it is the right
choice unless you mean to sign other companies up as customers. Choose
Multi-tenant (SaaS) to give every company that signs up its own workspace, plan
and billing, then say how a workspace is found — By subdomain
(
acme.yourdomain.com; in your panel, add the subdomain*— a wildcard — with the same folder as your domain, and a matching DNS record) and/or By a custom domain the customer points at this install — and give the Central domain your own pages (sign in, sign up, billing) live on. Trial length (days) (0 turns trials off) and Grace period (days), how long a workspace keeps working after its subscription lapses, can be changed later. You can switch between the two modes later too — see The tenant admin panel.
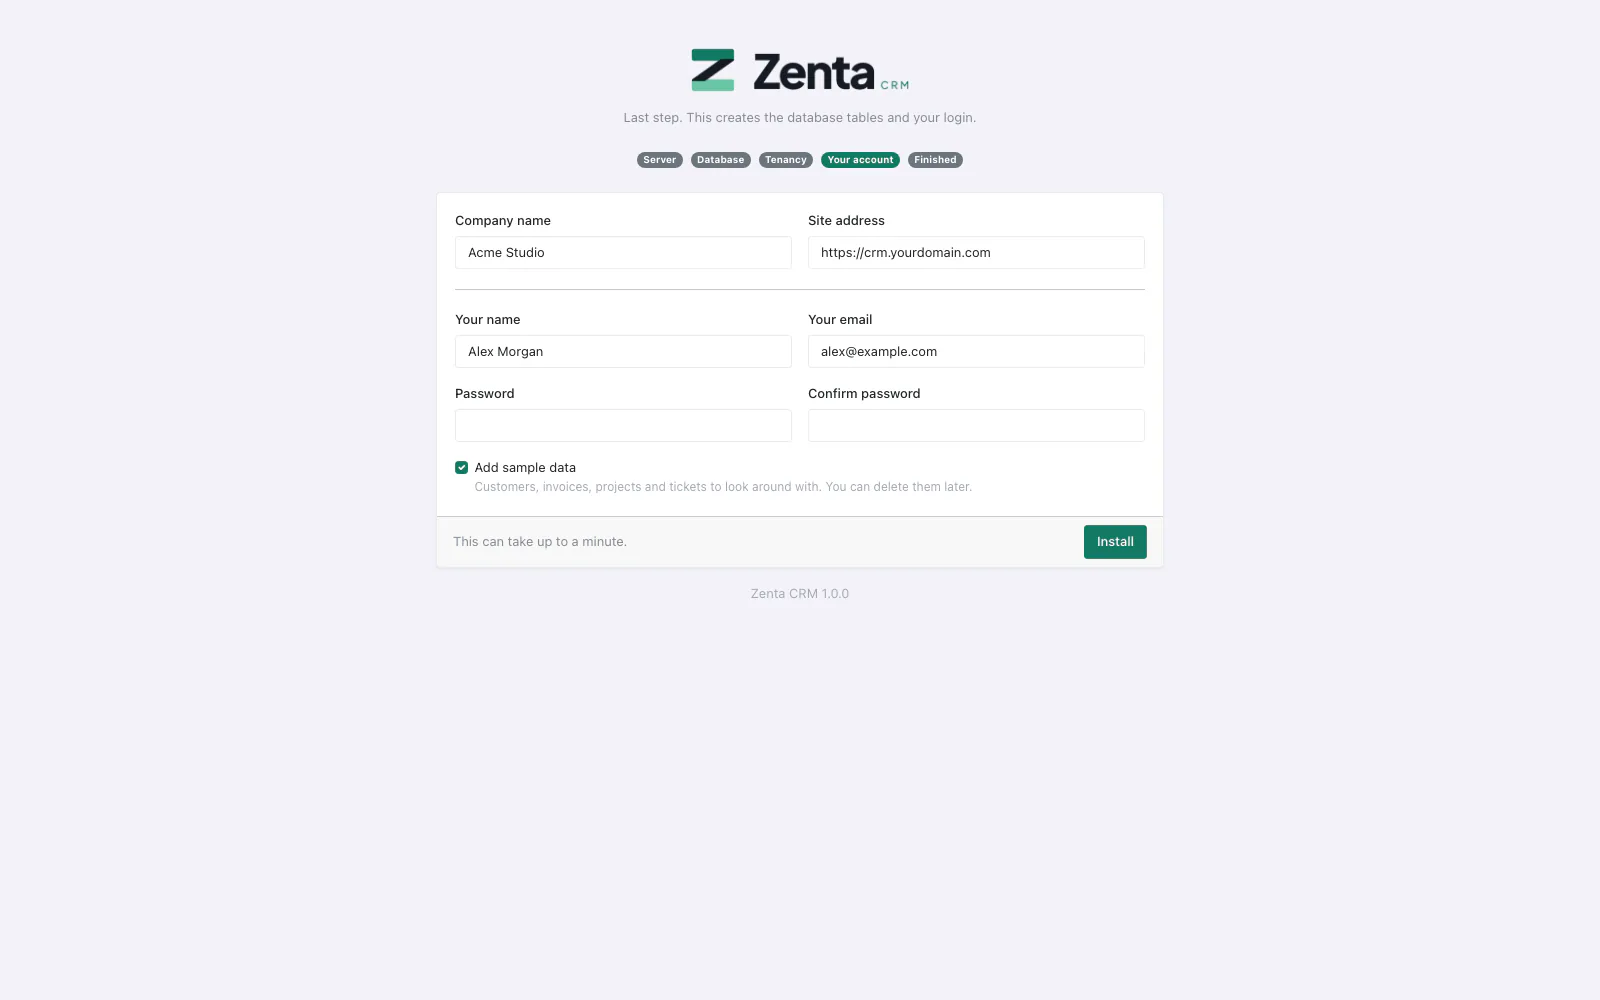 The last step: your company and your own login.
- Your account. Company name, Site address (filled in with the address you are using — change it if the site will live somewhere else), then Your name, Your email, a Password of at least eight characters and Confirm password. This is the administrator account you will sign in with. Tick Add sample data for customers, invoices, projects and tickets to look around with; you can delete them later.
- Press Install. This creates the database tables and your login. It usually takes under half a minute, and can take up to a minute on a slow shared host; leave the page open until it finishes.
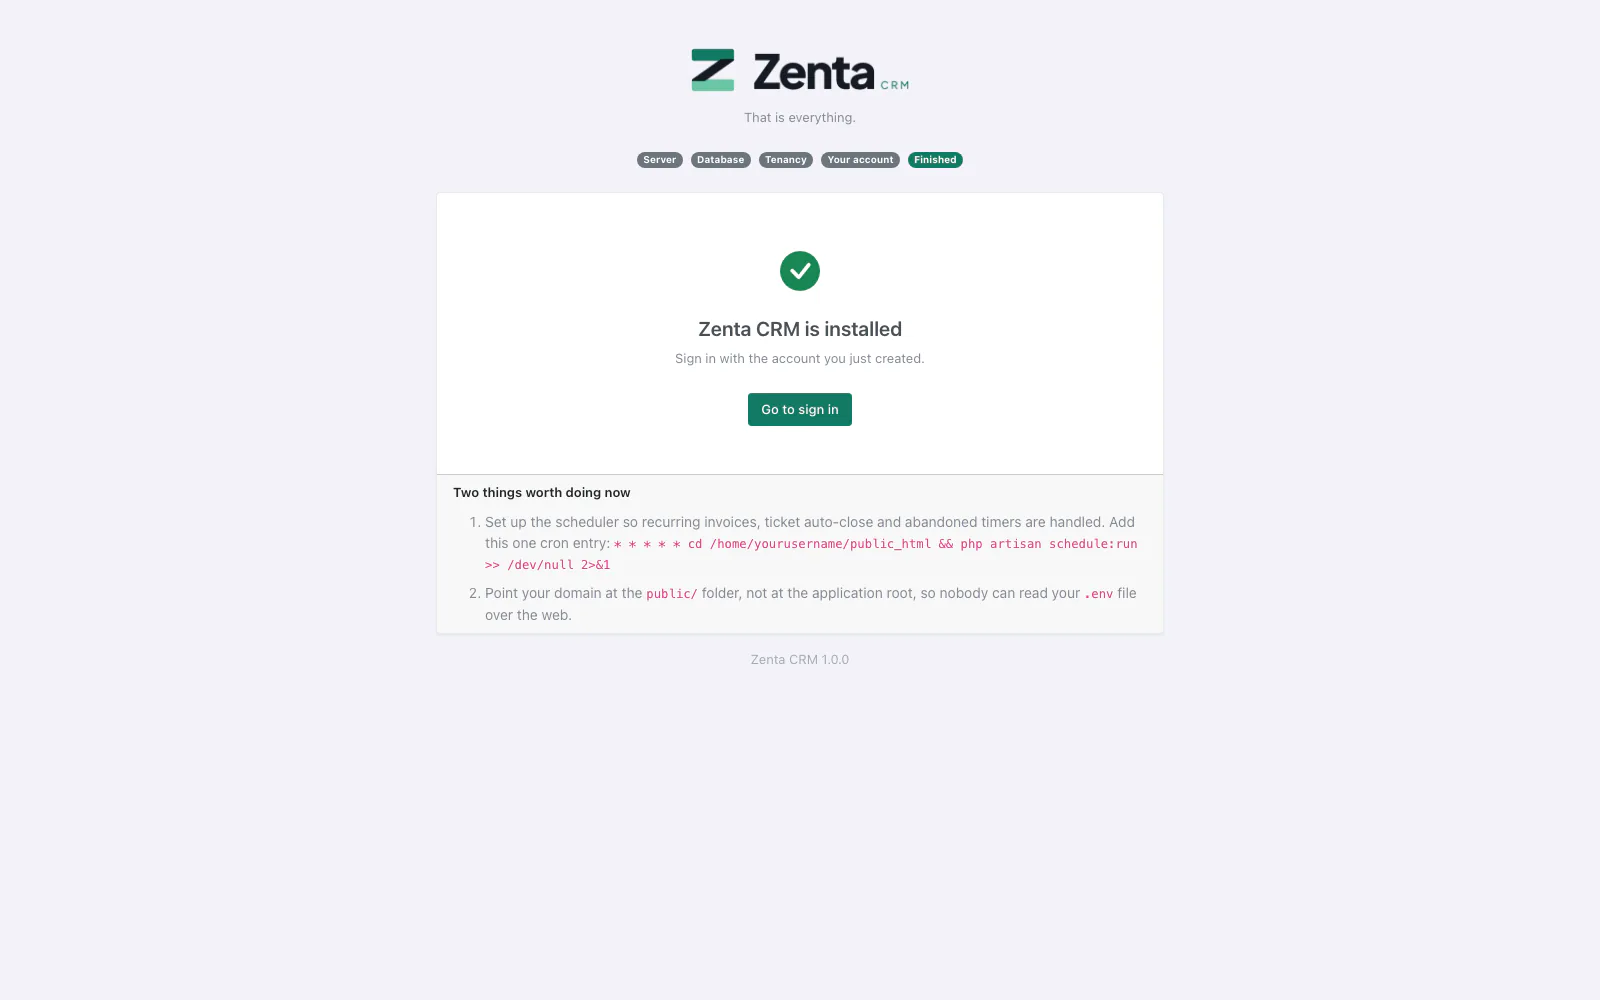 Zenta CRM is installed, with the cron line for this server underneath.
- Finished. Press Go to sign in and sign in with the account you just created. Under the button, One thing worth doing now gives the exact cron line for the folder you installed into — copy it for the scheduler below.
storage/installed.lock. From then on, opening any installer page takes
you to the sign-in page, and every installer action — testing a connection, saving the
database, installing — is refused with "page not found", so nobody can re-run it against
your live data, not even while your database is down. To reinstall on purpose, delete both
storage/installed.lock and .env on the server first.
One thing left: the scheduler
Several things happen on a timer — recurring invoices, closing tickets nobody has replied to, and stopping timers somebody forgot. All of them are driven by one cron entry. Without it, the application still works, but those jobs never run.
In cPanel this is Cron Jobs. Set it to run every minute:
* * * * * cd /home/yourusername/public_html && php artisan schedule:run >> /dev/null 2>&1Replace the path with wherever you uploaded the files. Laravel works out what is actually due, so running it every minute is correct and costs nothing. Settings → Scheduler shows the exact line for your server and says whether it is running — see The scheduler.
Sending email
Go to Settings → Email and enter your SMTP details. Use the address and password your host gives you for a real mailbox — mail sent from a mailbox that exists is far less likely to be treated as spam than mail sent by PHP directly. A Google Workspace or Microsoft 365 mailbox can be connected without its password, and a shared host's hourly sending limit respected — see Email delivery.
Updating later
Settings → Updates does this for you: upload the zip you download from CodeCanyon and it takes a backup, copies the new files and applies the database changes — see Updating. By hand:
- Back up your database and your
public/uploads/folder. - Upload the new files over the old ones. Do not delete
.env,public/uploads/orstorage/. - Apply the database changes. From SSH, or cPanel's Terminal, in the folder you uploaded to:
php artisan migrate --force. If your host gives you no command line, use Settings → Updates instead — it does this step for you.
Addresses on this page
For reference and for anyone scripting against the panel. These open without signing in until the install finishes; from then on the pages send you to the sign-in page and the actions answer "page not found".
| Method | Address | What it does |
|---|---|---|
GET | install | Step 1: the server check. |
GET | install/database | Step 2: the database form. |
POST | install/database/test | Test connection. |
POST | install/database | Saves the database details for the next steps. |
GET | install/tenancy | Step 3: one company or many. |
POST | install/tenancy | Saves the tenancy choice. |
GET | install/account | Step 4: your company and your login. |
POST | install/account | Install: writes .env, creates the tables and your account, and locks the installer. |
GET | install/done | Zenta CRM is installed. |